Theme Clarity
Chủ đề Hugo Clarity
Một chủ đề công nghệ dành cho Hugo dựa trên Hệ thống thiết kế Clarity mã nguồn mở của VMware với hỗ trợ mã phong phú, chế độ tối/sáng, hỗ trợ di động và nhiều hơn nữa. Xem bản demo trực tiếp tại neonmirrors.net .
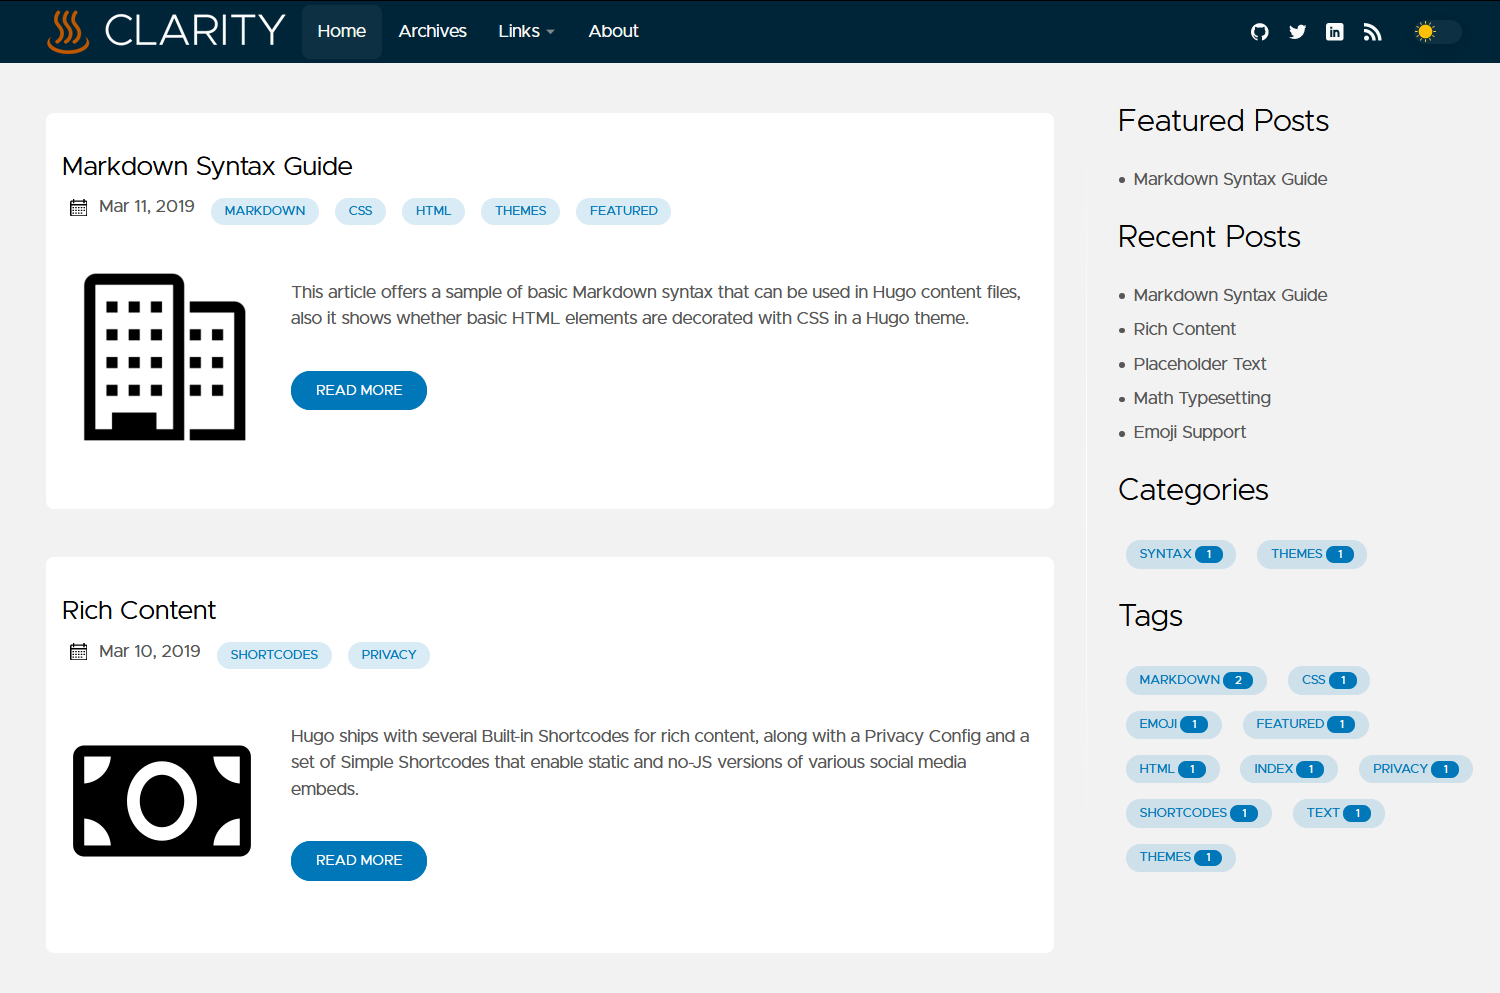
Xem trước trên máy tính để bàn
| Chế độ sáng | Chế độ tối |
|---|---|
| 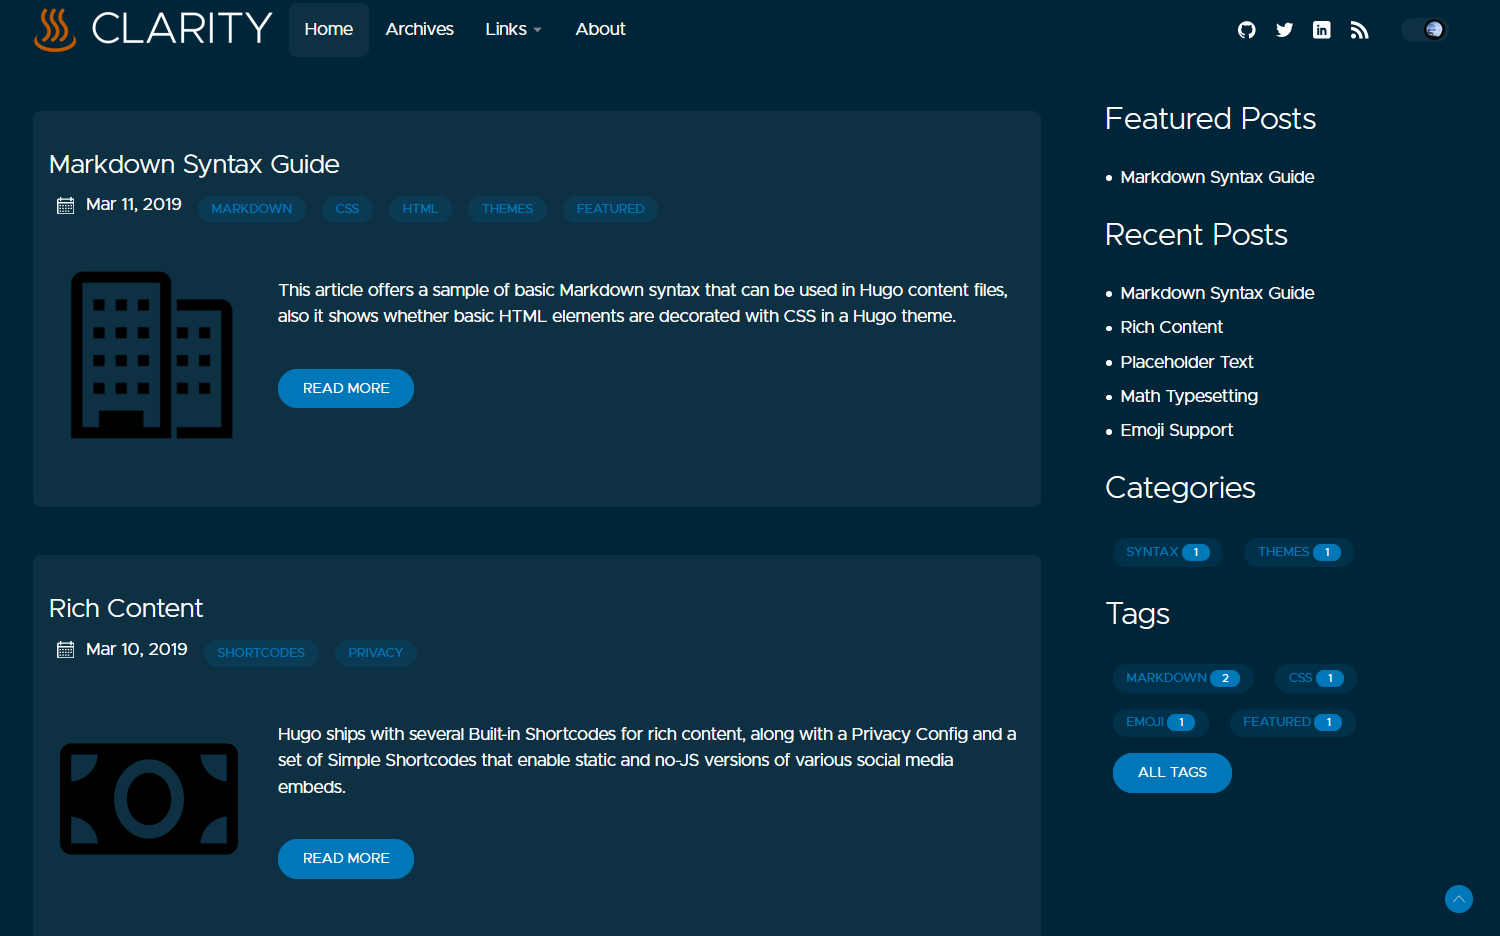 |
Xem trước trên thiết bị di động
| Chế độ sáng | Chế độ tối |
|---|---|
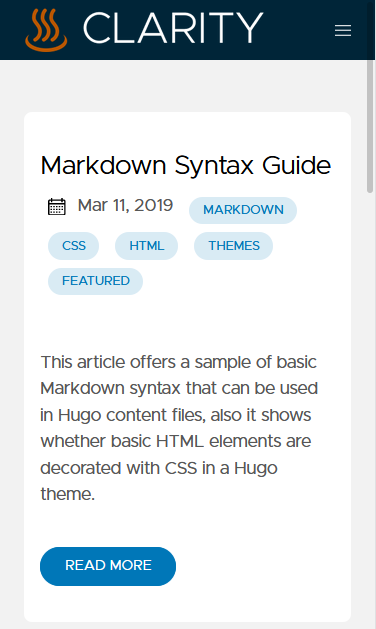 | 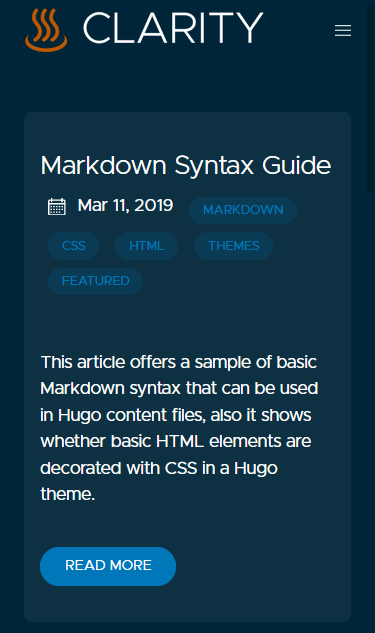 |
Đặc trưng
-
Blog có tùy chọn gắn thẻ và danh mục
-
Tìm kiếm
-
Liên kết sâu
-
Lựa chọn có sử dụng Hugo Page Bundles hay không
-
Tải chậm hình ảnh gốc
-
Có thể tùy chỉnh (xem cấu hình)
-
Chế độ tối (có điều khiển UI để cài đặt tùy chọn của người dùng)
-
Bảng mục lục có thể chuyển đổi
-
Số lượng hình tự động có thể chuyển đổi
-
Tuyên bố miễn trừ trách nhiệm của trang web có thể định cấu hình (ví dụ: "quan điểm của tôi không phải là của chủ lao động của tôi")
-
Cấu hình hình ảnh linh hoạt và hỗ trợ các định dạng hiện đại như WebP
-
Căn chỉnh logo
-
Hỗ trợ di động với chức năng căn chỉnh menu có thể cấu hình
-
Tô sáng cú pháp
-
Các chức năng khối mã phong phú bao gồm:
-
Sao chép vào clipboard
-
Chuyển đổi ngắt dòng (động)
-
Chuyển đổi số dòng
-
Nhãn ngôn ngữ
-
Chuyển đổi khối mở rộng/thu hẹp (động)
Để hiểu rõ hơn, sau đây là bản xem trước hiển thị tất cả chức năng.

-
Điều kiện tiên quyết
Trước tiên, hãy đảm bảo bạn đã cài đặt phiên bản mở rộng của Hugo 0.91.0 trở lên . Xem các bước cài đặt từ tài liệu chính thức của Hugo để biết thêm thông tin. Lưu ý rằng kho phần mềm có thể chậm hơn một số phiên bản và có thể không bao gồm phiên bản mở rộng.
Bắt đầu và chạy
Đọc các điều kiện tiên quyết ở trên và xác minh rằng bạn đang sử dụng phiên bản mở rộng của Hugo 0.91.0 hoặc mới hơn .
Có một số cách để sử dụng chủ đề này:
Tùy chọn 1a: Phát triển trong trình duyệt

Để thử nghiệm chủ đề, thử nghiệm nhanh và đóng góp Pull Request, Gitpod là lựa chọn dễ nhất. Sử dụng nút ở trên và nó sẽ tạo ra một môi trường dựng sẵn với một trang web sẵn sàng hoạt động.
Nếu bạn muốn đóng góp một PR, đây là bản tóm tắt hay về quy trình đó và cũng có một tiện ích mở rộng trình duyệt tùy chọn. Đọc thêm về việc đóng góp cho Hugo Clarity
Tùy chọn 1b: Phát triển trên máy của bạn
Nếu bạn không muốn sử dụng Gitpod, bạn cũng có thể thử nghiệm, phát triển và đóng góp PR cục bộ từ máy tính của mình.
git clone https://github.com/chipzoller/hugo-clarity cd hugo-clarity/exampleSite/ hugo server --themesDir ../..
Xin lưu ý rằng mặc dù đây là cách tốt để làm việc trên Hugo Clarity nhưng lại không phải là cách tốt để làm việc trên trang web của bạn vì nó sử dụng nội dung từ
exampleSite, và không nhận biết được bất kỳ nội dung ghi đè nào mà trang web của bạn có thể áp dụng cho chủ đề.
Đọc thêm về việc đóng góp cho Hugo Clarity
Tùy chọn 2: Mô-đun Hugo
Tùy chọn này được cho là ít tốn công sức nhất để chạy và bảo trì trang web của bạn với chủ đề Hugo Clarity.
Chúng tôi cho rằng bạn đã chạy hugo new site <sitename>và đang ở trong <sitename>thư mục.
-
Đảm bảo bạn đã
gocài đặt tệp nhị phân trên máy của mình. (Người dùng máy Mac:brew install go.) -
Chạy lệnh sau:
-
Hugo Clarity đi kèm với
exampleSitecác tệp được điền sẵn với cấu hình hữu ích và các bài đăng mẫu. Nếu bạn đang bắt đầu một trang web Hugo mới và chưa có nội dung nào, cách dễ nhất là lấy toàn bộ nội dung:
wget -O - https://github.com/chipzoller/hugo-clarity/archive/master.tar.gz | tar xz && cp -a hugo-clarity-master/exampleSite/* . && rm -rf hugo-clarity-master && rm -f config.toml
Nếu bạn đang sử dụng PowerShell, hãy dán lệnh sau:
wget -O - https://github.com/chipzoller/hugo-clarity/archive/master.tar.gz | tar xz -and cp -a hugo-clarity-master/exampleSite/* . -and rm -rf hugo-clarity-master -and rm -f config.toml
Nếu bạn đã có một trang web và không muốn mạo hiểm ghi đè bất kỳ thứ gì, chúng tôi khuyên bạn nên sao chép nội dung của configover, cũng như thay thế archetypes/post.md(nếu có) bằng Hugo Clarity. Sau đó di chuyển mọi cài đặt cần thiết từ <sitename>/config.tomlđến <sitename>/config/_default/config.tomlvà xóa tệp gốc <sitename>/config.toml.
-
Mở
<sitename>/config/_default/config.tomlvà thay đổitheme = "hugo-clarity"thànhtheme = ["github.com/chipzoller/hugo-clarity"] -
Bây giờ bạn có thể chạy:
Nếu bạn thấy quá nhiều thiết lập, thì mục đích của việc này là để giảm bớt sự khó khăn khi tải phiên bản mới của Hugo Clarity khi chúng được phát hành.
Để kéo các bản cập nhật chủ đề, hãy chạy hugo mod get -u github.com/chipzoller/hugo-clarity. Bạn cũng có thể cập nhật tất cả các mô-đun Hugo của mình bằng hugo mod get -u ./...– đọc thêm về việc cập nhật các mô-đun Hugo.
Bạn có thể làm được nhiều hơn với các mô-đun hugo, nhưng như vậy là đủ cho trường hợp sử dụng của chúng ta ở đây.
Tùy chọn 3: Git submodules
Đối với những ai chưa sẵn sàng sử dụng mô-đun Hugo, bạn có thể sử dụng "cách cũ" chỉ bằng git.
Chúng tôi cho rằng bạn đã chạy hugo new site <sitename>, đang ở trong <sitename>thư mục và có kho lưu trữ git đang hoạt động ( git init).
- Chạy:
git submodule add https://github.com/chipzoller/hugo-clarity themes/hugo-clarity
- Hugo Clarity đi kèm với
exampleSitecác tệp được điền sẵn với cấu hình hữu ích và các bài đăng mẫu. Nếu bạn đang bắt đầu một trang web Hugo mới và chưa có nội dung nào, cách dễ nhất là lấy toàn bộ nội dung:
cp -a themes/hugo-clarity/exampleSite/* . && rm -f config.toml
Nếu bạn đã có một trang web và không muốn mạo hiểm ghi đè bất kỳ thứ gì, chúng tôi khuyên bạn nên sao chép nội dung của configover, cũng như thay thế archetypes/post.md(nếu có) bằng Hugo Clarity. Sau đó di chuyển mọi cài đặt cần thiết từ <sitename>/config.tomlđến <sitename>/config/_default/config.tomlvà xóa tệp gốc <sitename>/config.toml.
- Bây giờ bạn có thể chạy:
Mặc dù thiết lập này ít hơn tùy chọn 2 ban �đầu, nhưng nó đi kèm với những cảnh báo quan trọng. Đầu tiên, để kéo các phiên bản mới của chủ đề, bạn sẽ cần chạy git submodule update --remote --merge và cam kết những thay đổi đó vào kho git của mình . Thứ hai, nếu bạn sao chép kho lưu trữ của mình sang một máy khác, có nhiều người làm việc trên trang web của bạn hoặc có tập lệnh tích hợp hoặc triển khai liên tục (như Netlify), sau khi sao chép, bạn cũng cần nhớ chạy git submodule update --init --recursiveđể lấy các tệp chủ đề.
Xem tổng quan về cách sử dụng git submodules cho chủ đề Hugo và cách khắc phục sự cố git submodules trong chủ đề Hugo để biết chi tiết.
Cấu hình
Hugo Clarity sử dụng thư mục cấu hình thay vì một tệp duy nhất. Nếu bạn đã quen với việc có một config.tomltệp trong thư mục chính của mình, thì bây giờ bạn sẽ thấy tệp đó nằm trong config/_default/config.toml, cùng với các tệp cài đặt khác.
Phần này chủ yếu sẽ đề cập đến các thiết lập dành riêng cho chủ đề này. Nếu có điều gì đó không được đề cập ở đây (hoặc ở nơi khác trong tệp này), rất có thể nó sẽ được đề cập trong trang tài liệu Hugo này.
Tham số toàn cầu
Các tùy chọn này thiết lập các giá trị toàn cục mà một số trang hoặc tất cả các trang trong trang web sử dụng theo mặc định.
| Tham số | Loại giá trị | Có thể ghi đè trên Trang |
|---|---|---|
| tác giả | bản đồ / chuỗi | KHÔNG |
| Twitter của tôi | sợi dây | KHÔNG |
| Thẻ Twitter lớn | Boolean | KHÔNG |
| phân tích ga | sợi dây | KHÔNG |
| google_tag_manager_id | sợi dây | KHÔNG |
| baidu_analytics | sợi dây | KHÔNG |
| phân tích hợp lý | Boolean | KHÔNG |
| phân tích matomo | Boolean | KHÔNG |
| Sự miêu tả | sợi dây | Đúng |
| từ khóa | mảng các chuỗi | Đúng |
| giới thiệuMô tả | sợi dây | Đúng |
| URL giới thiệu | chuỗi/sai | KHÔNG |
| numberOfTagsShown | số nguyên | KHÔNG |
| sử dụngPageBundles | Boolean | Đúng |
| FallBackOgHình ảnh | đường dẫn tập tin (chuỗi) | KHÔNG |
| Mã số MaxLines | số nguyên | Đúng |
| codeLineSố | Boolean | Đúng |
| mục chính | mảng/chuỗi | KHÔNG |
| trung tâmLogo | Boolean | KHÔNG |
| biểu tượng | đường dẫn tập tin (chuỗi) | KHÔNG |
| biểu tượngDir | đường dẫn dir (chuỗi) | KHÔNG |
| di độngĐiều hướng | sợi dây | KHÔNG |
| hìnhVị tríHiển thị | Boolean | Đúng |
| hình ảnhVị tríNhãn | sợi dây | KHÔNG |
| tùy chỉnhCSS | mảng đường dẫn tệp (chuỗi) | KHÔNG |
| tùy chỉnhJS | mảng đường dẫn tệp (chuỗi) | KHÔNG |
| thực thiLightMode | Boolean | Không có |
| thực thiDarkMode | Boolean | Không có |
| Tiêu đềPhân cách | sợi dây | KHÔNG |
| Hiển thịChia sẻ | Boolean | Đúng |
| bình luận | Boolean | Đúng |
| sốBài viết gần đây | số nguyên | KHÔNG |
| sốBài viết nổi bật | số nguyên | KHÔNG |
| pinĐặc sắc | Boolean | KHÔNG |
| sốBài viết được Ghim | số nguyên | KHÔNG |
| Định dạng ngày tháng | sợi dây | KHÔNG |
| bậtMathNotation | Boolean | Đúng |
| Phông chữ tùy chỉnh | Boolean | KHÔNG |
| từ | số nguyên | Không có |
| rss_tóm tắt | Boolean | Không có |
| rss_summary_read_more_link | Boolean | Không có |
| Hiển thịLiên quanTrongBài viết | Boolean | Đúng |
| Hiển thịLiên quanTrongThanh bên | Boolean | KHÔNG |
| chân trangLogo | sợi dây | Không có |
| bậtTìm kiếm | Boolean | Không có |
Tham số trang
Những tùy chọn này có thể được thiết lập từ phần nội dung trang hoặc thông qua các nguyên mẫu.
| Tham số | Loại giá trị | Ghi đè toàn cầu |
|---|---|---|
| tiêu đề | sợi dây | Không có |
| ngày | ngày | Không có |
| Sự miêu tả | sợi dây | Không có |
| từ khóa | mảng các chuỗi | Đúng |
| giới thiệuMô tả | sợi dây | Đúng |
| tóm tắt | sợi dây | Không có |
| bản tóm tắt | sợi dây | Không có |
| bản nháp | Boolean | Không có |
| đặc sắc | Boolean | Không có |
| thẻ | mảng/chuỗi | Không có |
| Thể loại | mảng/chuỗi | Không có |
| toc | Boolean | Không có |
| sử dụngPageBundles | Boolean | Đúng |
| tính năngHình ảnh | đường dẫn tập tin (chuỗi) | Không có |
| tính năngImageAlt | sợi dây | Không có |
| tính năngImageCap | sợi dây | Không có |
| hình thu nhỏ | đường dẫn tập tin (chuỗi) | Không có |
| chia sẻHình ảnh | đường dẫn tập tin (chuỗi) | Không có |
| Mã số MaxLines | số nguyên | Đúng |
| codeLineSố | Boolean | Đúng |
| hìnhVị tríHiển thị | Boolean | Đúng |
| hình ảnhVị tríNhãn | sợi dây | KHÔNG |
| bình luận | Boolean | Đúng |
| bậtMathNotation | Boolean | Đúng |
| Hiển thịNgày | Boolean | Không có |
| Hiển thịChia sẻ | Boolean | Không có |
| Hiển thịThời gian đọc | Boolean | Không có |
| thanh bên | Boolean | Không có |
| Cột đơn | Boolean | Không có |
| Hiển thịLiên quanTrongBài viết | Boolean | Không có |
| không có chỉ mục | Boolean | Không có |
Sửa đổi Menu
Menu chính
Để thêm, xóa hoặc sắp xếp lại các mục menu trên cùng, hãy chỉnh sửa các tệp ở đây. Cụ thể hãy tìm các mục có [[main]].
Nếu bạn thích cách tiếp cận truyền thống hơn, hãy xóa content\configthư mục và nhập mục menu chính bên trong config.tomltệp
Phương tiện truyền thông xã hội
Để chỉnh sửa liên kết hồ sơ phương tiện truyền thông xã hội của bạn, hãy chỉnh sửa các tệp được tham chiếu ở trên. Cụ thể, hãy tìm các mục có[[social]]
Nếu bạn muốn sử dụng thẻ tóm tắt Twitter lớn trên toàn cầu khi chia sẻ bài đăng, hãy đặt tham số toàn cầu largeTwitterCardthành true.
Phân tích trang web
Nếu sử dụng Google Analytics, hãy định cấu hình ga_analyticstham số toàn cục trong trang web của bạn bằng ID của bạn. Bạn có thể chọn đặt trình quản lý thẻ Google bằng cách sử dụng google_tag_manager_id.
Nếu sử dụng Baidu Analytics, hãy cấu hình baidu_analyticstham số toàn cục trong trang web của bạn bằng ID của bạn.
Nếu sử dụng Plausible Analytics, hãy cấu hình plausible_analyticscác tham số toàn cục trong trang web của bạn như sau.
enableĐể cho phép phân tích hợp lý thay đổi thành true.
websiteDomainĐặt tên miền cho trang web của bạn, trong hầu hết các trường hợp phải giống với URL cơ sở, điều này là bắt buộc.
plausibleDomainMặc định được đặt thành plausible.io, tham số này chỉ bắt buộc nếu plausible được tự lưu trữ.
scriptNameMặc định được đặt thành hợp lý, tham số này chỉ được yêu cầu nếu sử dụng tên tùy chỉnh cho tập lệnh.
Nếu sử dụng Matomo Analytics, hãy cấu hình matomo_analyticscác tham số toàn cục trong trang web của bạn như sau.
enableĐể bật tính năng phân tích Matomo, hãy thay đổi thành true.
websiteDomainĐặt tên miền cho trang web của bạn, trong hầu hết các trường hợp phải giống với URL cơ sở, đây là điều bắt buộc.
matomoDomainĐặt thành miền Matomo
matomoSiteIDMặc định được đặt thành 1, hãy thay đổi thành siteid đang được theo dõi
Thư mục blog
Chỉnh sửa params.tomlvà thay đổi mainSectionskhóa. Giá trị sẽ là thư mục chứa blog.
... mainSections = ["posts", "docs", "blogs"] ...
Để biết thêm thông tin, hãy xem tài liệu Hugo.
Vị trí menu di động
Menu điều hướng khi duyệt trên thiết bị di động có thể được cấu hình config.tomlđể mở sang phải hoặc trái tùy theo sở thích. Biểu tượng menu “hamburger” sẽ luôn hiển thị ở góc trên bên phải bất kể thế nào.
[params] ... mobileNavigation = "left" # Mobile nav menu will open to the left of the screen. ...
Thẻ và Phân loại
Hiển thị số lượng thẻ
Số lượng thẻ và phân loại (bao gồm cả danh mục) cần hiển thị có thể được cấu hình sao cho bất kỳ giá trị nào lớn hơn giá trị này chỉ có thể truy cập được khi nhấp vào nút Tất cả thẻ. Điều này nhằm đảm bảo có thể dễ dàng quản lý số lượng lớn thẻ hoặc danh mục mà không chiếm quá nhiều không gian màn hình. Chỉnh sửa tham numberOfTagsShownsố và đặt cho phù hợp.
[params] ... numberOfTagsShown = 14 # Applies for all other default & custom taxonomies. e.g categories, brands see https://gohugo.io/content-management/taxonomies#what-is-a-taxonomy ...
Số lượng thẻ ví dụ

Hình ảnh
Một số lớp CSS được tự động thêm vào hình ảnh dựa trên nguồn hoặc loại của chúng để hỗ trợ bạn trong bất kỳ điều chỉnh nào đối với chủ đề. Bao gồm:
image_figurekhi hình ảnh xuất hiện bên trong một<figure>phần tửimage_internalkhi hình ảnh là cục bộ, trong trang webimage_externalkhi hình ảnh được tải từ một URLimage_processedkhi hình ảnh đã được chuyển qua Hugo Pipes (yêu cầu hình ảnh phải sử dụng các gói trang hoặc nằm trong thưassetsmục)image_unprocessedkhi hình ảnh chưa được truyền qua Hugo Pipesimage_thumbnailkhi hình ảnh nằm trong danh sách trích đoạn nội dungimage_featuredkhi hình ảnh là biểu ngữ hoặc hình ảnh chính ở đầu bài đăngimage_svgkhi hình ảnh là SVG (và do đó không thể chạy qua Hugo Pipes)
Hầu hết hình ảnh trong Hugo Clarity được tải chậm và không đồng bộ để cải thiện tốc độ trang web. Hình ảnh không được tải theo cách này bao gồm logo của trang web.
Hình ảnh, cho dù được sử dụng trong nội dung Markdown hay sử dụng các tham số như featureImagehoặc thumbnail, có thể là hình ảnh cục bộ hoặc từ xa. Hình ảnh từ xa (bắt đầu bằng http...) sẽ tự động được tải xuống, lưu trữ và tối ưu hóa bởi Hugo Clarity, do đó trang web hoàn thiện sẽ chỉ phục vụ hình ảnh cục bộ.
Tổ chức tài nguyên trang
Theo mặc định, Hugo Clarity cho rằng các tài nguyên trang – hình ảnh và các tệp liên quan khác – được lưu trữ trong các thư mục statichoặc assets. Ngoài ra, bạn có thể chọn sử dụng các gói trang Hugo bằng cách đặt tùy usePageBundleschọn thành truetrong các tham số trang web của bạn. Sử dụng phương pháp này, bạn giữ các tài sản của bài đăng trong cùng thư mục với chính bài đăng đó.
Nếu bạn có một trang web hiện tại không sử dụng các gói trang nhưng muốn bắt đầu với các bài đăng mới, usePageBundlescó thể ghi đè ở cấp độ bài đăng trong phần đầu. Nếu không được đặt trong bài �đăng, nó sẽ mặc định là tham số của trang web. Hãy xem exampleSite/content/post/bundle/index.mdđể biết thêm thông tin và ví dụ về việc ghi đè cài đặt này trên một bài đăng riêng lẻ.
Hỗ trợ các định dạng hình ảnh hiện đại
If you are using page bundles (see above) and reference sample.jpg in your post, Hugo Clarity will check to see if the same image (based on filename) exists in the modern formats of WebP, AVIF or JXL. If it does, these will be presented to browsers as alternative options. Browsers that support these formats and the <picture> element will load them, while browsers that do not will fall-back to the default image.
Note that this does not create the other versions of the image for you, it simply checks to see if they exist. You may want to automate this process in your site build; here is one example.
Image captions
Image captions are automatically generated. If an image has title text, the caption will be created from it; if an image has no title text, the alt text will be used. To display an image with alt text but no caption, use title text of a single space (" ").
Examples of captions:
will display the localjane-doe.pngimage with a caption of “Jane Doe”.will display the remote imagejane-doe.pngwith a caption of “This is Jane Doe”.will display the local imagebuilding.pngwith no caption.
Examples of this can also be found in the “Markdown Syntax Guide” post in the example site content.
NOTE: Due to limitations in Markdown, single and double quotes should not be used within alt or title text.
Adding figure positions to image captions
You have the option of prepending a desired string such as “Figure N” to the caption text of images within an article’s content.
Two global settings control this feature:
figurePositionLabelis a string which will be prepended to any caption text of an article image; by default this is set to “Figure”.figurePositionShowcontrols, globally, whether to show this label. (It does not affect the visibility of image captions in general, only the prepended figure position text.) For more granular control,figurePositionShowcan be overridden at the article level if desired.
Figure numbers will be automatically inserted after the figurePositionLabel text, starting from the top of the article and increasing as you move down.
Example of image with figure positions added
Assume that figurePositionLabel is set to “Figure” in config.toml and this is the first image in a given article.


Inline images
To make an image inline, append :inline to its alt text.
Inline images example
<!-- an inline image without alt text -->  <!-- an inline image with alt text --> 

Float images to the left
To align a blog image to the left, append :left to its alt text. Article text will then flow to the right of the image.
Float images left example
<!-- a left-floated image without alt text -->  <!-- a left-floated image with alt text --> 
Float images to the right
To align a blog image to the right, append :right to its alt text. Article text will then flow to the left of the image.
Float images right example
<!-- a right-floated image without alt text -->  <!-- a right-floated image with alt text --> 
Round borders for images
To make the image borders round, append ::round to its alt text. This is a pre-defined image class commonly used to display portrait images. Note that round is just another class and it can be mixed with other classes separated by space.
Round borders for images example
<!-- an image without alt text and round borders-->  <!-- an image with alt text and round borders-->  <!-- a left-floating image without alt text and with round borders--> 
Add classes to images
To add a CSS class to an image, append ::<classname> to its alt text. You can also add multiple classes to an image separated by space. ::<classname1> <classname2>.
Image classes example
<!-- an image without alt text -->  <!-- an image with alt text --> 
Featured image
Each article can specify an image that appears at the top of the content.
... featureImage: "images/2020-04/capv-overview/featured.jpg" ...
The path for the featured image is relative to the static directory if not using Page Bundles, and relative to the post’s own directory if using them.
Two other frontmatter settings allow you to set alt text for the featured image and an optional caption.
... featureImageAlt: 'Text describing the featured image' # Alternative text for featured image. featureImageCap: 'A caption appearing below the image.' # Caption (optional). ...
Unless specified using featureImageCap, a caption will not be generated for the featured image.
Thumbnail image
Each article can specify a thumbnail image which will be displayed on the left of the article’s card on the home page and in lists of articles.
... thumbnail: "images/2020-04/capv-overview/thumbnail.jpg" ...
Thumbnails look best when square (height:width ratio of 1:1) and at least 150x150 pixels.
The path for the thumbnail image is relative to the static directory if not using Page Bundles, and relative to the post’s own directory if using them.
Each article can specify a share image which will used when the article is shared on social media.
... shareImage: "images/theImageToBeUsedOnShare.png" ...
If a share image is not specified, the order of precedence that will be used to determine which image applies is thumbnail => featureImage => fallbackOgImage. That is, if no thumbnail is specified, the featured image will be used; if neither is specified, the fallback image will be used.
When sharing a link to the home page of the site (as opposed to a specific article), the fallbackOgImage will be used.
The path for the share image is relative to the static directory if not using Page Bundles, and relative to the post’s own directory if using them.
Logo alignment
You can left align or center your site’s logo.
... centerLogo = true # Change to false to align left ...
If no logo is specified, the title of the site will appear in its place.
Code
Display line numbers
Choose whether to display line numbers within a code block globally with the parameter codeLineNumbers setting to true or false.
[params] ... codeLineNumbers = true # Shows line numbers for all code blocks globally. ...
Limit code block height
You can globally control the number of lines which are displayed by default for your code blocks. Code which has the number of lines exceed this value will dynamically cause two code block expansion buttons to appear, allowing the user to expand to full length and contract. This is useful when sharing code or scripts with tens or hundreds of lines where you wish to control how many are displayed. Under params in config.toml file, add a value as follows:
[params] ... codeMaxLines = 10 # Maximum number of lines to be shown by default across all articles. ...
If the value already exists, change it to the desired number. This will apply globally.
If you need more granular control, this parameter can be overridden at the blog article level. Add the same value to your article frontmatter as follows:
... codeMaxLines = 15 # Maximum number of lines to be shown in code blocks in this blog post. ...
If codeMaxLines is specified both in config.toml and in the article frontmatter, the value specified in the article frontmatter will apply to the given article. In the above example, the global default is 10 and yet the article value is 15 so code blocks in this article will auto-collapse after 15 lines.
If codeMaxLines is not specified anywhere, an internal default value of 100 will be assumed.
Line Highlighting
It is possible to highlight specific lines in a code block by applying {hl_lines=[7]} after the fence and language. For example, the below snippet will highlight lines 7 and 8 in the code block to which it is applied.
```yaml {hl_lines=[7,8]}
Ranges are also supported by quoting the range inside the braces.
```yaml {hl_lines=["7-18"]}
Table of contents
Each article can optionally have a table of contents (TOC) generated for it based on top-level links. By configuring the toc parameter in the article frontmatter and setting it to true, a TOC will be generated only for that article. The TOC will then render under the featured image.
Table of contents (TOC) example

Pinning featured posts
This allows you to show the featured posts at the top of the post list.
Use the site configuration option pinFeatured to enable/disable it, and the option numberOfPinnedPosts to control how many posts to be pinned.
Custom CSS and JS
To minimize HTTP requests per page, we would recommend loading CSS styles and JavaScript helpers in single bundles. That is to say, one CSS file and one JavaScript file. Using Hugo minify functions, these files will be minified to optimize the size.
Going by the above 👆🏻 reason, we recommend adding custom CSS and JS via these files:
_override.sass. This file should only be used to override sass & css variables e.g theme colors_custom.sass. This file should only be used to override everything else except sass & css variables.custom.js.
Pro Tip: Ensure that your changes are git trackable by creating these files outside the theme directory. That is, at the root level of your site’s directory. See tree below.
├── yourSite<span></span>
│ ├── archetypes<span></span>
│ │ └── post.md<span></span>
│ ├── assets<span></span>
│ │ ├── js<span></span>
│ │ │ └── custom.js<span></span>
│ │ └── sass<span></span>
│ │ ├── _custom.sass<span></span>
│ │ └── _override.sass<span></span>
│ ├── config<span></span>
│ │ └── _default<span></span>
│ │ ├── config.toml<span></span>
│ │ ├── configTaxo.toml<span></span>
│ │ ├── languages.toml<span></span>
│ │ �├── markup.toml<span></span>
│ │ ├── menus<span></span>
│ │ │ ├── menu.en.toml<span></span>
│ │ │ └── menu.pt.toml<span></span>
│ │ └── params.toml<span></span>
│ ├── content<span></span>
│ │ ├── _index.md<span></span>
However, sometimes you may need to load additional style or script files. In such cases, you can add custom .css and .js files by listing them in the config.toml file (see the snippet below). Similar to images, these paths should be relative to the static directory.
[params] ... customCSS = ["css/custom.css"] # Include custom CSS files customJS = ["js/custom.js"] # Include custom JS files ...
Notices
This theme includes functionality to display some “hightlight blocks” - called “notices” using a shortcode.
For example, see the shortcode markup below will render as a notice:
{{% notice note "Note Title" */%}}<span></span>
This will be the content of the note.<span></span>
{{% /notice %}}<span></span>
For more examples see the “Notices” page in the exampleSite.
Site Disclaimer
The theme includes the ability to put a Disclaimer on your website (e.g. “My views are my own and not my employer’s”). Currently, the disclaimer displays in the sidebar under the author information. You can enable and customize it as follows:
- Uncomment the
sidebardisclaimerparameter inconfig/_default/params.toml. - Uncomment and edit the
disclaimerTextparameter inconfig/_default/params.toml. - Add and modify an override for the
div.sidebardisclaimerselector inassets/saas/_custom.sass.
div.sidebardisclaimer{padding: 0px 10px 15px 10px;margin: 20px 5px 20px 5px;border: 1px solid #eee;border-left-width: 10px;border-right-width: 10px;border-radius: 5px 5px 5px 5px;border-left-color: orange;border-right-color: orange;border-top-color:orange;border-bottom-color:orange}
The code for the sidebar disclaimer text is in
layouts/partials/sidebar.html. The default color scheme displays in both light and dark mode. Additionally, the styling has been placed into_custom.sassso that it’s easily editable with beginner’s understanding of CSS properties and easier to find.
Forcing light or dark mode
By default, sites authored using Clarity will load in the browser with the user’s system-wide settings. I.e., if the underlying OS is set to dark mode, the site will automatically load in dark mode. Regardless of the default mode, a UI control switch exists to override the theme mode at the user’s discretion.
In order to override this behavior and force one mode or another, add either enforceLightMode or enforceDarkMode to your config.toml file. If neither value is present, add it.
To enforce Light Mode by default, turn enforceLightMode to true.
To enforce Dark Mode by default, turn enforceDarkMode to true
[params] ... enforceLightMode = true # Force the site to always load in light mode. ...
Please note that you cannot enforce both modes at the same time. It wouldn’t make sense, would it?
⚠️ Please also note that the mode toggle UI will remain in place. That way, if a user prefers dark mode, they can have their way. The best of both worlds.
I18N
This theme supports Multilingual (i18n / internationalization / translations)
The exampleSite gives you some examples already. You may extend the multilingual functionality by following the official documentation.
Things to consider in multilingual:
- supported languages are configured in config/_default/languages.toml
- add new language support by creating a new file inside i18n directory. Check for missing translations using
hugo server --i18n-warnings - taxonomy names (tags, categories, etc…) are translated in i18n as well (translate the key)
- menus are translated manually in the config files config/_default/menus/menu.xx.toml
- menu’s languages list are semi-hardcoded. You may chose another text for the menu entry with languageMenuName. Please, do better and create a PR for that.
- content must be translated individually. Read the official documentation for information on how to do it.
note: if you do NOT want any translations (thus removing the translations menu entry), then you must not have any translations. In the exampleSite that’s as easy as removing the extra translations from the config/_default/... or executing this one-liner:
sed '/^\[pt]$/,$d' -i config/_default/languages.toml && rm config/_default/menus/menu.pt.toml
To change the values of translatable text, such as read_more or copyright, edit the values in the language file you are using in the i18n directory. If you have no such directory, copy the one inside the theme to your root Hugo directory.
Hooks
Clarity provides some hooks for adding code on a page.
If you need to add some code (CSS import, HTML meta or similar) to the head section on every page, add a partial to your project:
layouts/partials/hooks/head-end.html
Similar, if you want to add some code right before the body end (e.g fonts’ links), create your own version of the following file:
layouts/partials/hooks/body-end.html
Comments
Clarity supports Hugo built-in Disqus partial. You can enable Disqus simply by setting disqusShortname in your configuration file.
You can also override layouts/partials/comments.html to take advantage of disqus comments Alternatives for details.
Please leave
#disqusShortname = ""commented out if you decide to use other comments tools
You can disable them site-wide by setting comments = false under [params] from config.toml file and vice versa. Omitting that setting will default to comments will be enabled.
You can override these setting from each post individually. For example, you may want to disable/enable comments on specific posts. Use the same syntax used on the config.toml file.
please use
commentsand notcomment
Utterances Commenting Support
If you wish use Utterances comments on your site, you’ll need to perform the following:
- Ensure you have a GitHub public repository, which you’ve granted permissions to the Utterances GitHub App.
- Comment out the line for
disqusShortname = ""in the/config/_default/config.tomlfile. - Set
comments = truein the/config/_default/params.tomlfile. - Configure the utterances parameters in the
/config/_default/params.tomlfile. - Optionally, you can choose a label that will be assigned to all issues created by Utterances. The label must exist in your Github repository, as Utterances cannot attach labels that do not exist. Configure
utterancesLabelparameter in/config/_default/params.tomlfile, after you have added a label to your Github repository Issues labels. Labels are case sensitive and support Emoji in label names. ✨💬✨
Utterances is loaded in the comments.html partial by referring to the utterances.html partial. Since single.html layout loads comments if comments are enabled, you must ensure both the comments and utterances parameters are configured.
Math notation
Clarity uses KaTeX for math type setting if enableMathNotation is set to true in global or page parameters (the latter takes precedence).
Also see supported TeX commands in KaTeX.
If you want chemical typesetting provided by the mhchem extension, first copy [site]/themes/clarity/layouts/partials/math.html to [site]/layouts/partials/math.html:
# cd /path/to/site mkdir -p layouts/partials && cp themes/clarity/layouts/partials/math.html layouts/partials/math.html
Then add the corresponding line as its README suggested (without the + sign):
<link rel="stylesheet" href="https://cdn.jsdelivr.net/npm/katex@0.12.0/dist/katex.min.css" integrity="sha384-AfEj0r4/OFrOo5t7NnNe46zW/tFgW6x/bCJG8FqQCEo3+Aro6EYUG4+cU+KJWu/X" crossorigin="anonymous"> <script defer src="https://cdn.jsdelivr.net/npm/katex@0.12.0/dist/katex.min.js" integrity="sha384-g7c+Jr9ZivxKLnZTDUhnkOnsh30B4H0rpLUpJ4jAIKs4fnJI+sEnkvrMWph2EDg4" crossorigin="anonymous"></script> + <script defer src="https://cdn.jsdelivr.net/npm/katex@0.12.0/dist/contrib/mhchem.min.js" integrity="sha384-5gCAXJ0ZgozlShOzzT0OWArn7yCPGWVIvgo+BAd8NUKbCmulrJiQuCVR9cHlPHeG" crossorigin="anonymous"></script> <script defer src="https://cdn.jsdelivr.net/npm/katex@0.12.0/dist/contrib/auto-render.min.js" integrity="sha384-mll67QQFJfxn0IYznZYonOWZ644AWYC+Pt2cHqMaRhXVrursRwvLnLaebdGIlYNa" crossorigin="anonymous" onload="renderMathInElement(document.body);"></script>
The added line should be before auto-render.min.js and after katex.min.js.
MathJax
The new version of MathJax has comparable performance to KaTeX and better support for TeX commands.
If you prefer MathJax, create a blank [site]/layouts/partials/math.html and add the following two lines:
<script src="https://polyfill.io/v3/polyfill.min.js?features=es6"></script> <script id="MathJax-script" async src="https://cdn.jsdelivr.net/npm/mathjax@3/es5/tex-mml-chtml.js"></script>
This file will take precedence over the one Clarity provides and the site will load MathJax instead of KaTeX.
Related Content
Related content within a series taxonomy can be shown at the end of a piece of content, or optionally on the sidebar above the Related Content section.
The site configuration option showRelatedInArticle controls if this option is enabled. The same configuration option can be used in a posts frontmatter to disable the feature (but the site configuration overrides the per-page option).
Likewise, the site configuration option showRelatedInSidebar controls if related content is shown on the sidebar. There is no corresponding option within a post to disable this.
Maps
Creating and including a map
First create a map for free on https://umap.openstreetmap.fr/en/. Then include this map by using the openstreetmap shortcode, e.g. {{<openstreetmap mapName="demo-map_1" >}}
Options
The only required parameter is mapName. All other parameters are completely optional.
Available parameters are:
coordX(defaultauto)coordY(defaultauto)scale(defaultauto)scaleControl(defaulttrue)miniMap(defaultfalse)scrollWheelZoom(defaulttrue)zoomControl(defaulttrue)allowEdit(defaultfalse)moreControl(defaulttrue)searchControl(defaulttrue)tilelayersControl(defaultnull)embedControl(defaultnull)datalayersControl(defaulttrue)onLoadPanel(defaultnone)captionBar(defaultfalse)
Search
Search is currently a BETA feature. Ensure you have these settings inside your configuration files:
# config/_default/config.toml [outputs] home = ["HTML", "RSS","JSON"]
# config/_default/params.toml enableSearch = true
Next add the search.md file from the exampleSite and add it to your content folder. This is not necessary if you recently created a site based on the example site and already have the file.
Compose, from which this feature is derived, implements fuse.js to enable search functionality. At the time of this writing, search on this theme takes either of the following forms:
-
Passive search
This occurs only when the user loads the search page i.e
/search/. They can directly navigate to that url. Alternatively, the user can type the search query on the search field and hit enter. They will be redirected to the search page which will contain matched results if any.Currently, this only works on the default language. Support for multilingual passive search is coming soon.
-
Live search
This behavior will be obvious as the user types a search query on the search field. All valid search queries will yield a list of quick links or a simple “no matches found”. Else, the user will be prompted to continue typing.
Live search works even for multilingual sites.
For Chinese-like languages, it may or may not work.
Search Scope
-
Searching within a section will yield results from that section.
For example, if you have 3 sections in your content i.e
blog,docs&examples, searching in thedocssection will only produce results for that section. -
Searching outside a section will search the entire site.
For example, with the above setup, searching from the homepage will produce results from the entire site.
Contributing
Please read our contribution guidelines, and thank you for being involved!
Quy tắc ứng xử
Hugo Clarity có một bộ quy tắc ứng xử. Vui lòng tuân thủ trong mọi tương tác của bạn với dự án.
Giấy phép
Hugo Clarity là phần mềm mã nguồn mở theo giấy phép MIT.